Description
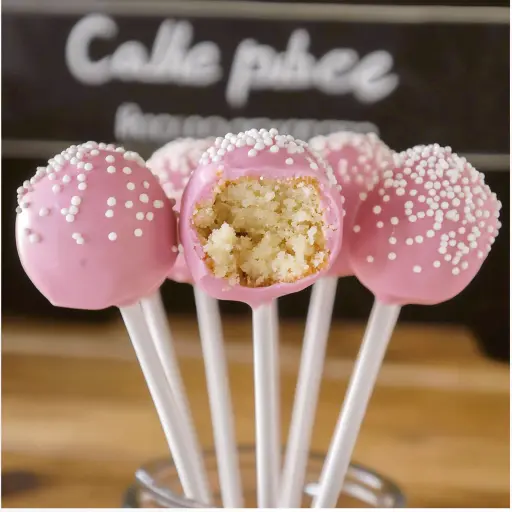
Bring the joy of Starbucks to your own kitchen with these delightful Cake Pops! This easy-to-follow recipe allows you to create moist, flavorful cake balls coated in sweet candy melts and adorned with colorful sprinkles. Perfect for parties, celebrations, or a fun baking project with kids, these homemade cake pops are sure to be a crowd-pleaser. Customize your flavors and decorations for a truly unique treat!
Ingredients:
For the Cake:
- 1 box vanilla or chocolate cake mix (plus ingredients listed on the box: eggs, oil, water)
- OR your favorite homemade cake recipe
For the Frosting:
- 1/3 cup (75 g) vanilla or chocolate frosting
For the Coating:
- 2 cups (340 g) candy melts (white, pink, or chocolate)
- 1 tablespoon vegetable oil or coconut oil (optional, for thinning)
For Decoration:
- Sprinkles or nonpareils
- Cake pop sticks (available at craft stores or online)
Preparation:
Step 1: Bake the Cake: Prepare the cake batter according to the package directions or your homemade recipe.
Step 2: Pour the batter into a 9×13-inch (23×33 cm) baking dish and bake as directed.
Step 3: Let the cake cool completely before moving on to the next step.
Step 4: Crumble the Cake: Once the cake is cool, crumble it into fine crumbs using your hands or a fork. Transfer the crumbs to a large mixing bowl.
Step 5: Add Frosting: Add the frosting to the cake crumbs, starting with 1/4 cup and increasing as needed. Mix until the cake crumbs stick together when pressed. The mixture should be moist but not overly sticky.
Step 6: Shape the Cake Balls: Scoop about 1 tablespoon of the cake mixture and roll it into a smooth ball using your hands.
Step 7: Place the cake balls on a parchment-lined baking sheet. Freeze for 15–20 minutes to firm up.
Step 8: Melt the Candy Coating: In a microwave-safe bowl, melt the candy melts according to the package instructions. Stir every 30 seconds to prevent overheating. Add a tablespoon of vegetable oil or coconut oil to thin the mixture, if needed.
Step 9: Assemble the Cake Pops: Dip the tip of each cake pop stick into the melted candy coating, then insert it into the center of each cake ball (about halfway through). This helps secure the stick.
Step 10: Return the cake pops to the freezer for 10 minutes to allow the coating to set.
Step 11: Dip and Decorate: Holding the stick, dip each cake pop into the melted candy coating, rotating to coat it evenly. Gently tap off any excess coating.
Step 12: Immediately decorate with sprinkles or toppings before the coating sets. Place the cake pops upright in a foam block or cake pop stand to dry completely.
Step 13: Serve and Enjoy: Once the candy coating has hardened, the cake pops are ready to serve.
Why You’ll Love This Recipe:
- Fun and Creative: Cake pops are a canvas for creativity! You can experiment with different cake flavors, frosting types, candy melts colors, and a wide variety of sprinkles and decorations.
- Perfect for Any Occasion: Whether it’s a birthday party, a holiday gathering, or just a sweet treat for yourself, cake pops are always a hit.
- Kid-Friendly: This recipe is a great way to get kids involved in the kitchen. They’ll love helping to crumble the cake, roll the balls, and decorate the finished pops.
- Customizable: Tailor the flavors and decorations to suit your personal preferences or the theme of your event.
- Make-Ahead Friendly: Cake pops can be made in advance and stored in the freezer, making them a convenient option for busy schedules.
Serving Suggestions:
- Display with Style: Arrange your cake pops in a cake pop stand or a foam block for an attractive presentation. You can also tie ribbons around the sticks for an extra touch of elegance.
- Party Favors: Wrap individual cake pops in cellophane bags and tie with a ribbon to create adorable party favors.
- Dessert Table Centerpiece: Use cake pops as part of a larger dessert table display, coordinating the colors and decorations to match your theme.
- Pair with Other Treats: Serve cake pops alongside other desserts like cookies, cupcakes, or brownies for a variety of sweet options.
- Themed Parties: Get creative with your decorations to match the theme of your party. For example, use blue and white candy melts and snowflake sprinkles for a winter wonderland theme.
Tips:
- Don’t Overmix: When mixing the frosting with the cake crumbs, avoid overmixing, as this can make the cake pops tough. Mix just until the mixture comes together.
- Chill Time is Key: Freezing the cake balls before dipping them in the candy coating helps them hold their shape and prevents them from falling off the sticks.
- Thin the Candy Melts: If the candy melts are too thick, add a teaspoon of vegetable oil or coconut oil at a time until you reach the desired consistency. This will help the coating go on smoothly.
- Tap Off Excess Coating: Gently tap the cake pops against the side of the bowl to remove any excess candy coating, which will prevent drips and create a neater finish.
- Work Quickly: The candy coating sets quickly, so be sure to decorate the cake pops immediately after dipping them.
- Use a Foam Block: A foam block or cake pop stand is essential for allowing the cake pops to dry upright without the coating sticking to anything.
- Quality Ingredients: Using high-quality cake mix, frosting, and candy melts will result in the best-tasting cake pops.
- Experiment with Flavors: Don’t be afraid to experiment with different cake and frosting combinations to find your favorite flavor pairings. Red velvet cake with cream cheese frosting is always a winner!
- Troubleshooting Sticky Mixture: If the cake mixture is too sticky, add a little more crumbled cake to dry it out. If it’s too dry, add a little more frosting.
- Melt Coating in intervals: When melting your candy coating in the microwave, it is best to do so in 30 second intervals and stir each time to prevent burning the coating.
Prep Time: 20 minutes Cook Time: 25-30 minutes Total Time: 1 hour (including cooling and freezing time)
Nutritional Information (estimated, per cake pop):
- Calories: 200-250
- Protein: 2-3g
- Sodium: 100-150mg
Note: Nutritional information can vary depending on the specific ingredients used.
Conclusion
These Starbucks-inspired Cake Pops are a fun and rewarding baking project that anyone can enjoy. With endless customization possibilities, you can create unique and delicious treats for any occasion. Gather your ingredients, unleash your creativity, and get ready to impress your friends and family with these irresistible homemade cake pops!
Q&A About This Recipe:
Q1: Can I use homemade cake instead of a cake mix?
A: Absolutely! Using your favorite homemade cake recipe will add an extra layer of deliciousness to your cake pops. Just make sure the cake is cooled completely before crumbling it.
Q2: What if my candy melts are too thick to dip the cake pops evenly?
A: A simple solution is to add a tablespoon of vegetable oil or coconut oil to the melted candy. Stir it in thoroughly until the candy reaches a smoother, more fluid consistency. Be careful not to add too much oil, as this can affect the setting of the candy.
Q3: How long can I store the cake pops?
A: You can store the finished cake pops in an airtight container at room temperature for up to 2 days, or in the refrigerator for up to 1 week. For longer storage, you can freeze the cake pops (without the candy coating) for up to 2 months. Thaw them completely before coating and decorating.
Q4: What if my cake balls are falling off the sticks when I dip them?
A: Make sure the cake balls are firm by freezing them for at least 15-20 minutes before dipping. Also, when inserting the sticks, dip the tip of each stick into the melted candy coating first, as this will act as a glue to secure the stick to the cake ball. Allow the coating on the stick to set slightly before dipping the entire cake pop.
Q5: Can I use different types of decorations besides sprinkles?
A: Definitely! Get creative with your decorations. You can use chopped nuts, mini chocolate chips, crushed cookies, edible glitter, or even drizzle the cake pops with a contrasting color of candy melts. The possibilities are endless!