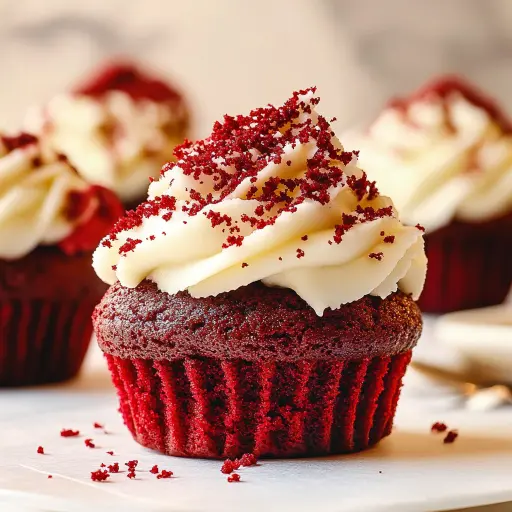
Description: These Red Velvet Cupcakes are the epitome of indulgence. Moist, tender, and vibrantly colored, they boast a subtle cocoa flavor that’s perfectly complemented by a tangy and sweet cream cheese frosting. A classic treat, these cupcakes are perfect for celebrations, holidays, or simply satisfying your sweet tooth. Get ready to bake a batch of these delightful beauties!
Ingredients:
Red Velvet Cupcakes
- ⅓ cup unsalted butter, room temperature
- 1 cup granulated sugar
- 2 large eggs, room temperature
- 1 ½ tablespoons unsweetened cocoa powder
- 3 teaspoons water
- 1 teaspoon red gel food coloring
- 2 teaspoons vanilla extract
- ¾ cup buttermilk
- 1 ¾ cups all-purpose flour
- ½ teaspoon salt
- ½ teaspoon baking soda
- 2 teaspoons white vinegar
Cream Cheese Frosting
- 8 ounces cream cheese, full fat, block style, room temperature
- 6 tablespoons unsalted butter, room temperature
- 4 cups powdered sugar, sifted
- 1 teaspoon vanilla extract
- Pinch of salt
Preparation:
Red Velvet Cupcakes
Step 1: Preheat the oven to 350°F (175°C). Line a 12-cup muffin pan with cupcake liners. This ensures that the cupcakes bake evenly and don’t stick to the pan. The liners also make it easier to remove the cupcakes after baking.
Step 2: In the bowl of a stand mixer fitted with the paddle attachment, add the softened butter and granulated sugar. Beat on medium speed until light and fluffy, about 3 minutes. Creaming the butter and sugar together incorporates air, creating a light and airy texture in the final cupcakes. Scrape down the bowl a couple of times during this process to ensure even mixing.
Step 3: Add the eggs one at a time, beating well after each addition until fully incorporated. Scrape down the bowl as needed. Adding the eggs gradually allows them to emulsify properly with the butter and sugar, contributing to a smooth and stable batter.
Step 4: In a small bowl, whisk together the cocoa powder, water, red food coloring, and vanilla extract until smooth. This creates a concentrated flavor and color base for the cupcakes. Using gel food coloring is recommended as it provides a more vibrant color without adding excess liquid to the batter.
Step 5: Add the cocoa mixture to the beaten butter, eggs, and sugar. Beat until all ingredients are fully incorporated, and the contents of the bowl are uniform in color. This ensures that the cocoa and red color are evenly distributed throughout the batter.
Step 6: Turn the mixer to its lowest speed and gradually add one-third of the buttermilk followed by one-third of the flour. Repeat these steps until all the buttermilk and flour have been used up, mixing until just combined after each addition. Alternating between wet and dry ingredients helps to prevent overmixing, which can lead to tough cupcakes.
Step 7: Next, add the salt, baking soda, and white vinegar to the cake batter. Beat to combine, but do not overmix. This step is crucial for the signature Red Velvet reaction. The vinegar reacts with the baking soda, creating carbon dioxide, which helps the cupcakes rise and gives them their characteristic tang.
Step 8: Fill the cupcake liners approximately ¾ full. This allows the cupcakes to rise properly without overflowing the liners. Using a cookie scoop or measuring cup can help ensure consistent filling.
Step 9: Bake the cupcakes for 18-20 minutes, or until the tops spring back when touched with your finger and a toothpick inserted into the center comes out clean. Baking time may vary depending on your oven, so it’s important to check for doneness regularly.
Step 10: Leave the cupcakes to cool for a few minutes in the pan before transferring them to a wire rack to cool completely. Cooling the cupcakes completely prevents the frosting from melting and ensures a stable base for decorating.
Step 11: (Optional) Once the cupcakes are cooled, use a sharp serrated knife to trim the tops so they are flat. Blitz the trimmed tops into crumbs using a food processor or blender for decorating later. This is a great way to add a touch of elegance and visual appeal to the cupcakes.
Cream Cheese Frosting
Step 1: In the bowl of a stand mixer fitted with the paddle attachment, add the softened cream cheese and butter. Beat on medium speed for 2 minutes until creamy, scraping down the bottom and sides of the bowl as needed. Creaming the cream cheese and butter together ensures a smooth and lump-free frosting.
Step 2: Swap the paddle attachment for the whisk attachment. This will help create a light and fluffy frosting.
Step 3: Add the sifted powdered sugar, vanilla extract, and salt to the mixing bowl. Beat slowly until the powdered sugar has been incorporated. Increase the speed to medium and beat for 2 minutes. The cream cheese frosting should look light and smooth. Sifting the powdered sugar prevents lumps and ensures a smooth texture.
Step 4: At this stage, assess if you need to add any extra powdered sugar. Cream cheese frosting is not as thick as buttercream, but it needs to be thick enough to hold up when piped. Add powdered sugar gradually until the desired consistency is achieved.
Step 5: Transfer the cream cheese frosting to a piping bag fitted with a star nozzle (e.g., Wilton 1M). Pipe swirls on top of each cupcake and decorate with a few crumbs (from the trimmed cupcake tops, if available).
Step 6: Serve and enjoy your decadent Red Velvet Cupcakes!
Why You Will Love This Recipe:
This Red Velvet Cupcake recipe is a guaranteed crowd-pleaser for several reasons. First, the cupcakes themselves are incredibly moist and tender, thanks to the use of buttermilk and the balanced ratio of wet and dry ingredients. The subtle cocoa flavor provides a delightful contrast to the tangy cream cheese frosting, creating a harmonious blend of flavors that will tantalize your taste buds. Moreover, the striking red color adds a touch of elegance and visual appeal, making these cupcakes perfect for special occasions. This recipe is easy to follow, even for novice bakers, and the results are consistently delicious. Plus, you can customize the decorating to your liking, adding your personal touch to these classic treats.
Serving Suggestions:
- Serve these cupcakes as a delightful dessert after a meal.
- They are perfect for birthday parties, holidays, and other celebrations.
- Pair them with a glass of cold milk, coffee, or tea.
- Arrange them beautifully on a platter for a visually appealing presentation.
- Add fresh berries or chocolate shavings for extra garnish.
Tips:
- Ensure all ingredients are at room temperature for best results.
- Use gel food coloring for a vibrant red color.
- Do not overmix the batter to avoid tough cupcakes.
- Cool the cupcakes completely before frosting.
- Adjust the amount of powdered sugar in the frosting to achieve the desired consistency.
- Store the frosted cupcakes in the refrigerator to maintain their freshness.
Prep Time: 30 minutes
Cook Time: 20 minutes
Total Time: 50 minutes
Nutritional Information: (per cupcake, approximate)
- Calories: 473 kcal
- Protein: 5 g
- Sodium: 233 mg
Conclusion:
These Red Velvet Cupcakes with Cream Cheese Frosting are a truly decadent treat that’s sure to impress. With their moist texture, subtle cocoa flavor, and vibrant red color, they are the perfect combination of taste and visual appeal. Whether you’re baking for a special occasion or simply want to indulge in a sweet treat, this recipe is a winner. So, gather your ingredients, preheat your oven, and get ready to create a batch of these irresistible cupcakes!
Questions and Answers:
Q1: Can I use a different type of food coloring?
A: While liquid food coloring can be used, gel food coloring is highly recommended for achieving a vibrant red color without adding too much liquid to the batter.
Q2: Can I make the cupcakes ahead of time?
A: Yes, the cupcakes can be made a day or two ahead of time and stored in an airtight container at room temperature or in the refrigerator. Frost them just before serving.
Q3: Can I freeze the cupcakes?
A: Yes, you can freeze the unfrosted cupcakes. Wrap them tightly in plastic wrap and then in a freezer bag. Thaw at room temperature before frosting.
Q4: Can I use a different type of flour?
A: All-purpose flour is recommended for this recipe. Cake flour can also be used for a more tender crumb, but you may need to adjust the liquid accordingly.
Q5: What if my frosting is too runny?
A: If your cream cheese frosting is too runny, gradually add more sifted powdered sugar, one tablespoon at a time, until you reach the desired consistency. Be careful not to add too much, as this can make the frosting too sweet.