Description:
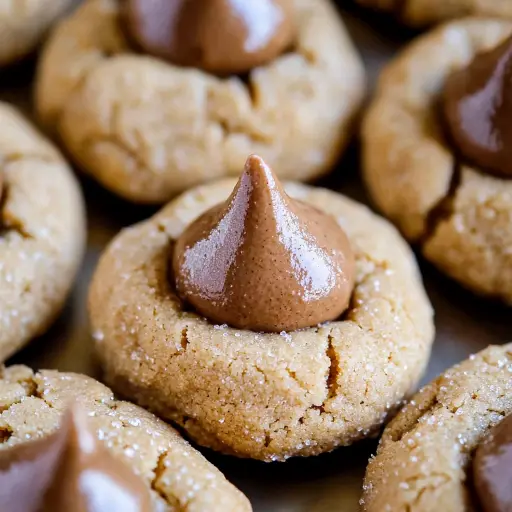
These classic Peanut Butter Blossom Cookies are soft, chewy peanut butter cookies rolled in sugar and topped with a Hershey’s Kiss. A delightful combination of sweet and salty, they are perfect for holidays, parties, or simply satisfying your sweet tooth. Easy to make and always a crowd-pleaser, these cookies are a must-bake!
Ingredients:
- 1/2 cup (1 stick) unsalted butter, softened
- 1/4 cup granulated sugar
- 3/4 cup packed brown sugar
- 1 cup creamy peanut butter (not natural)
- 1 large egg
- 1 1/2 teaspoons vanilla extract
- 1 1/2 cups all-purpose flour, spooned and leveled
- 1 teaspoon baking soda
- 1/4 teaspoon kosher salt
- 1/2 cup granulated sugar, for rolling
- Approximately 40 Hershey’s Kisses (about half of an 11-ounce package), unwrapped and chilled/frozen
Preparation:
Step 1: Chill the Hershey’s Kisses: Place the unwrapped Hershey’s Kisses in the freezer for at least 15 minutes, or even longer. This helps them hold their shape when pressed into the warm cookies. Nobody likes a melted mess!
Step 2: Cream Butter and Sugars: In a large bowl or stand mixer fitted with the paddle attachment, cream the softened butter until smooth and creamy. Scrape down the sides of the bowl to ensure even mixing. Add the 1/4 cup granulated sugar and 3/4 cup packed brown sugar. Beat the mixture until it is light and fluffy, scraping down the sides of the bowl as needed. This step is crucial for incorporating air into the dough, which results in a tender cookie. The mixture should be free of any visible chunks of butter.
Step 3: Add Peanut Butter, Egg, and Vanilla: Add the 1 cup of creamy peanut butter to the mixture. Creamy peanut butter is recommended here. Beat well until fully combined. Then, add the large egg and 1 1/2 teaspoons of vanilla extract. Beat until everything is thoroughly incorporated. The egg helps to bind the ingredients together and adds moisture, while vanilla extract enhances the overall flavor profile of the cookies.
Step 4: Combine Dry Ingredients: In a separate bowl, whisk together the 1 1/2 cups of all-purpose flour, 1 teaspoon of baking soda, and 1/4 teaspoon of kosher salt. Spoon and level the flour when measuring to avoid using too much, which can result in dry cookies. Baking soda helps the cookies to rise and spread slightly, while salt balances the sweetness. Slowly add the dry ingredients to the wet ingredients, mixing on low speed. Mix until just combined; be careful not to overmix the dough, as this can develop the gluten in the flour and result in tough cookies.
Step 5: Chill the Dough: Cover the bowl with plastic wrap and chill the dough in the refrigerator for at least 15 minutes to an hour. Chilling the dough helps to prevent the cookies from spreading too much during baking and allows the flavors to meld together. You can chill the dough for up to 2 days if needed, but let it sit at room temperature for a few minutes before rolling it into balls.
Instructions:
- Preheat Oven and Prepare Baking Sheets: Preheat your oven to 350 degrees F (175 degrees C). Line two baking sheets with parchment paper or silicone baking mats. This prevents the cookies from sticking and makes cleanup easier.
- Shape Dough and Roll in Sugar: Place the 1/2 cup of granulated sugar into a small bowl. Shape the chilled dough into 1-inch balls using a cookie scoop or your hands. Roll each ball in the granulated sugar, ensuring it is fully coated. The sugar coating adds a delightful sweetness and a slightly crisp texture to the outside of the cookies.
- Arrange on Baking Sheets: Place the sugared dough balls onto the prepared baking sheets, leaving about 2 inches of space between each cookie. The cookies don’t spread much, so you can place them a bit closer than usual.
- Bake the Cookies: Bake the cookies in the preheated oven for 8-10 minutes. The cookies are done when the edges are set and the centers are matte, not shiny. Be careful not to overbake them, as they will become dry and crumbly.
- Add Hershey’s Kisses: Remove the baking sheets from the oven and immediately press one frozen Hershey’s Kiss into the center of each cookie. The edges of the cookies should crack slightly around the Kiss. The contrast of the warm cookie and the cool chocolate is heavenly.
- Cool and Set: Let the cookies cool on the baking sheets for about 5 minutes to allow the chocolate to set slightly. Then, carefully transfer them to a wire rack to cool completely. This prevents the bottoms from becoming soggy.
Why You Will Love This Recipe:
- Classic Flavor Combination: The perfect blend of peanut butter and chocolate is a match made in heaven.
- Easy to Make: With simple ingredients and straightforward instructions, this recipe is great for bakers of all skill levels.
- Crowd-Pleaser: These cookies are always a hit at parties, gatherings, and holiday celebrations.
- Versatile: Customize them with different flavored Hershey’s Kisses or add sprinkles for a festive touch.
- Make-Ahead Friendly: The dough can be made in advance and chilled, making these cookies perfect for busy schedules.
Serving Suggestions:
- Serve warm with a glass of cold milk.
- Package them in a decorative tin for a thoughtful gift.
- Include them in a cookie exchange or dessert platter.
- Enjoy them as a sweet treat after dinner.
- Pair them with a scoop of vanilla ice cream for a decadent dessert.
Tips:
- Don’t overmix the dough to prevent tough cookies.
- Chill the dough to prevent excessive spreading during baking.
- Freeze the Hershey’s Kisses to keep them from melting completely.
- Use parchment paper or silicone baking mats for easy cleanup.
- Store leftover cookies in an airtight container at room temperature for up to 3 days.
- For a variation, try using different flavored Hershey’s Kisses, such as caramel or dark chocolate.
- If the dough is too sticky to handle, add a tablespoon of flour at a time until it reaches the desired consistency.
- Make sure your oven temperature is accurate for consistent baking results.
Prep Time: 20 minutes Cook Time: 8-10 minutes Total Time: 30-40 minutes (including chilling time)
Nutritional Information (per cookie): (Approximate values, will vary based on specific ingredients and portion size)
- Calories: 150
- Protein: 3g
- Sodium: 50mg
Conclusion:
Peanut Butter Blossom Cookies are a timeless classic for good reason. Their delightful combination of peanut butter, sugar, and chocolate makes them irresistible. This recipe is simple to follow, perfect for bakers of all skill levels, and guarantees a batch of soft, chewy, and utterly delicious cookies every time. Whether you’re baking for a holiday, a special occasion, or just a sweet treat, these cookies are sure to be a hit. So gather your ingredients, preheat your oven, and get ready to enjoy the magic of Peanut Butter Blossom Cookies!
Questions and Answers About This Recipe:
- Can I use natural peanut butter in this recipe?
- While you can use natural peanut butter, the texture and consistency of the cookies may differ slightly. Natural peanut butter tends to be oilier, which can cause the cookies to spread more during baking. If you use natural peanut butter, make sure to stir it well before measuring and consider adding an extra tablespoon or two of flour to the dough if it seems too wet. For best results, stick with a commercial creamy peanut butter like Jif or Skippy.
- Why is it important to chill the Hershey’s Kisses before putting them on the cookies?
- Chilling or even freezing the Hershey’s Kisses helps them maintain their shape when pressed into the warm cookies. If the Kisses are at room temperature, they will melt quickly and lose their pointed shape, resulting in a messy appearance. By chilling them, you ensure that they stay intact and create that iconic Blossom look.
- What if my cookie dough is too sticky to handle?
- If your cookie dough is too sticky, add a tablespoon of flour at a time until it reaches a manageable consistency. Be careful not to add too much flour, as this can make the cookies dry and tough. Another tip is to make sure you measured the flour correctly by spooning and leveling it. Also, chilling the dough for a longer period can help to firm it up and make it easier to handle.
- How do I prevent the cookies from spreading too much during baking?
- To prevent excessive spreading, make sure to chill the dough for at least 30 minutes before baking. Using the correct amount of flour is also crucial. Spoon and level the flour when measuring to avoid using too much. Additionally, ensure that your oven temperature is accurate, as an oven that is too hot can cause the cookies to spread more quickly. Finally, don’t grease the cookie sheet.
- Can I make the dough ahead of time and bake the cookies later?
- Yes, you can definitely make the cookie dough ahead of time. The dough can be stored in the refrigerator for up to 2 days. Before baking, let the dough sit at room temperature for a few minutes to soften slightly. This will make it easier to roll into balls. Alternatively, you can freeze the dough for longer storage. Wrap it tightly in plastic wrap and place it in a freezer bag. When ready to bake, thaw the dough in the refrigerator overnight.