Description
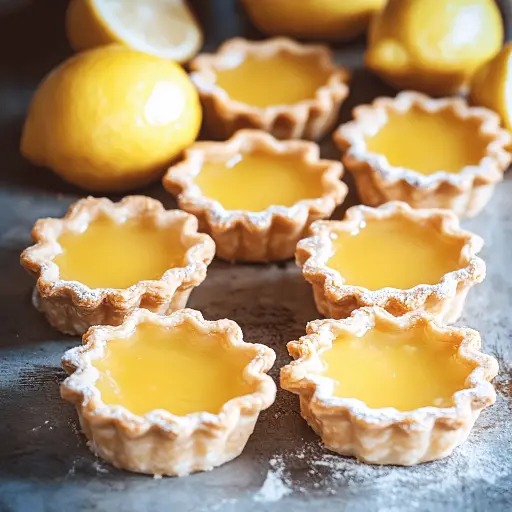
These Lemon Curd Tartlets are the perfect blend of sweet and tart, encased in a delicate, buttery crust. A ray of sunshine on a plate, these mini desserts are surprisingly easy to make and are guaranteed to impress. Perfect for afternoon tea, dessert buffets, or a special treat just for yourself! The bright, citrusy flavor of the lemon curd pairs perfectly with the crisp, melt-in-your-mouth pastry. Let’s get baking!
Ingredients:
For the Tart Shells:
- 1 1/4 cups (160g) all-purpose flour
- 1/2 cup (113g) unsalted butter, cold and cubed
- 1/4 cup (50g) granulated sugar
- 1 large egg yolk
- 2 tablespoons (30ml) ice water
For the Lemon Curd:
- 3 large eggs
- 3/4 cup (150g) granulated sugar
- 1/2 cup (120ml) fresh lemon juice (about 3-4 lemons)
- 1 tablespoon lemon zest
- 6 tablespoons (85g) unsalted butter, softened
Preparation:
Make the Tart Shells:
- Step 1: In a food processor, combine the flour, cold cubed butter, and sugar. Pulse until the mixture resembles coarse crumbs. This is crucial for achieving a flaky crust! The cold butter prevents gluten development, leading to a tender texture.
- Step 2: Add the egg yolk and pulse again until just combined. The egg yolk adds richness and helps bind the dough.
- Step 3: Slowly add the ice water, one tablespoon at a time, pulsing after each addition, until the dough starts to come together. Be careful not to over-process! You want the dough to be just moist enough to form a ball. Overworking the dough will result in a tough crust.
- Step 4: Form the dough into a disk, wrap it tightly in plastic wrap, and chill in the refrigerator for at least 30 minutes. This resting period allows the gluten to relax, which will prevent the crust from shrinking during baking. Plus, it makes the dough much easier to roll out!
- Step 5: Preheat the oven to 375°F (190°C). On a lightly floured surface, roll out the chilled dough to about 1/8-inch thickness. Use a cookie cutter or a knife to cut out circles slightly larger than your tartlet pans (2–3 inches in diameter).
- Step 6: Gently press the dough circles into the tartlet pans, ensuring they fit snugly against the bottom and sides. Trim any excess dough with a sharp knife.
- Step 7: Prick the bottoms of the tart shells with a fork. This prevents the crust from puffing up unevenly during baking.
- Step 8: Line each tart shell with parchment paper and fill with pie weights or dried beans. This blind-baking step helps the crust maintain its shape.
- Step 9: Bake for 10 minutes, then carefully remove the parchment paper and weights. Continue baking for another 5–7 minutes, or until the crust is lightly golden brown. Keep a close eye on them; you want them to be golden but not burnt.
- Step 10: Let the baked tart shells cool completely on a wire rack before filling. This is important to prevent the lemon curd from melting or softening the crust.
Make the Lemon Curd:
- Step 1: In a heatproof bowl (stainless steel or glass), whisk together the eggs, sugar, and fresh lemon juice. Make sure the bowl fits snugly over your saucepan without touching the water below.
- Step 2: Place the bowl over a pot of simmering water (double boiler). Ensure the water isn’t boiling vigorously, as this can cook the eggs too quickly and create a curdled mixture.
- Step 3: Cook, whisking constantly, until the mixture thickens enough to coat the back of a spoon (about 10–12 minutes). Constant whisking is key to preventing lumps and ensuring a smooth curd. You’ll know it’s ready when you can run your finger across the back of the spoon and the line holds its shape.
- Step 4: Remove the bowl from the heat and immediately stir in the softened butter and lemon zest. The residual heat will melt the butter and create a rich, glossy curd. The lemon zest adds an extra layer of flavor.
- Step 5: Let the lemon curd cool slightly before filling the tart shells. This will help prevent the crust from becoming soggy.
Assemble the Tartlets:
- Step 1: Spoon or pipe the lemon curd into the cooled tart shells, filling them almost to the top.
- Step 2: Smooth the tops of the curd with a spatula or the back of a spoon for a neat presentation.
- Step 3: (Optional) Garnish with fresh berries (raspberries, blueberries, or strawberries work beautifully), a dusting of powdered sugar, a dollop of whipped cream, or a sprinkle of lemon zest for an extra pop of color and flavor.
Why You’ll Love This Recipe
- Bright and Refreshing Flavor: The tangy lemon curd is a delightful contrast to the sweet, buttery crust.
- Elegant Presentation: These tartlets look as good as they taste, making them perfect for any occasion.
- Make-Ahead Friendly: Both the tart shells and lemon curd can be prepared in advance, making assembly a breeze.
- Customizable: Easily adapt the recipe by adding different flavor extracts or using different fruits for garnish.
- Perfect Portion Size: These tartlets are the ideal individual dessert.
Presentation Suggestions:
- Arrange the tartlets on a tiered serving stand for an elegant display.
- Dust with powdered sugar just before serving for a delicate touch.
- Serve alongside a scoop of vanilla ice cream or a dollop of lightly sweetened whipped cream.
- Garnish with fresh mint leaves for a pop of green.
- Create a citrus theme by serving with other lemon-flavored treats.
Tips:
- Keep Ingredients Cold: Cold butter is essential for a flaky tart crust. Use ice water to prevent gluten development.
- Don’t Overwork the Dough: Overmixing the dough will result in a tough crust. Pulse the ingredients in the food processor until just combined.
- Blind Bake Properly: Blind baking ensures the crust is fully cooked before adding the filling. Use pie weights or dried beans to prevent the crust from puffing up.
- Whisk Constantly: When making the lemon curd, whisk continuously to prevent lumps from forming.
- Use Fresh Lemon Juice: Freshly squeezed lemon juice provides the best flavor. Avoid using bottled juice if possible.
- Adjust Sweetness to Taste: If you prefer a less tart curd, add a bit more sugar.
- Storage: Store the filled tartlets in the refrigerator for up to 2 days. The crust may soften slightly over time.
Preparation Time: 45 minutes
Cook Time: 25 minutes
Total Time: 1 hour 10 minutes (plus chilling time)
Nutritional Information (per tartlet, estimate):
(Please note that these are estimates and will vary based on specific ingredients and portion sizes.)
- Calories: 250-300
- Protein: 3-4g
- Sodium: 50-70mg
Conclusion:
Lemon Curd Tartlets are a delightful treat that’s sure to brighten any day. With their perfect balance of sweet and tart, they’re a crowd-pleaser for any occasion. Don’t be intimidated by the multiple steps; with a little patience and attention to detail, you’ll be rewarded with a batch of elegant and delicious mini desserts. Happy baking!
Q&A about Lemon Curd Tartlets:
Q1: Can I make the tart shells ahead of time?
A: Absolutely! In fact, I highly recommend it. You can bake the tart shells up to 2 days in advance and store them in an airtight container at room temperature. This makes assembling the tartlets much quicker when you’re ready to serve them. Just be sure they’re completely cool before storing them.
Q2: I don’t have a food processor. Can I make the tart dough by hand?
A: Yes, you definitely can! Just use a pastry blender or your fingertips to cut the cold butter into the flour and sugar until the mixture resembles coarse crumbs. Then, proceed with adding the egg yolk and ice water as directed. Be careful not to overwork the dough when mixing by hand.
Q3: My lemon curd is too tart. How can I fix it?
A: If your lemon curd is too tart for your liking, you can stir in a little bit more granulated sugar, one tablespoon at a time, until you reach your desired sweetness level. Be sure to taste it after each addition to avoid over-sweetening. Alternatively, you could serve the tartlets with a dollop of lightly sweetened whipped cream to balance the tartness.
Q4: My lemon curd is too runny. What did I do wrong?
A: Runny lemon curd usually indicates that it wasn’t cooked long enough. Make sure you’re cooking the curd over a gentle simmer, whisking constantly, until it thickens enough to coat the back of a spoon. If it’s still too runny after the recommended cooking time, continue cooking for a few more minutes, whisking constantly, until it reaches the desired consistency.
Q5: Can I use store-bought lemon curd and tart shells to save time?
A: Absolutely! If you’re short on time, using store-bought lemon curd and pre-made tart shells is a great shortcut. Look for high-quality versions for the best taste and texture. Just be sure to choose tart shells that are sturdy enough to hold the filling without becoming soggy. This is a perfect way to enjoy a delicious treat without spending hours in the kitchen.