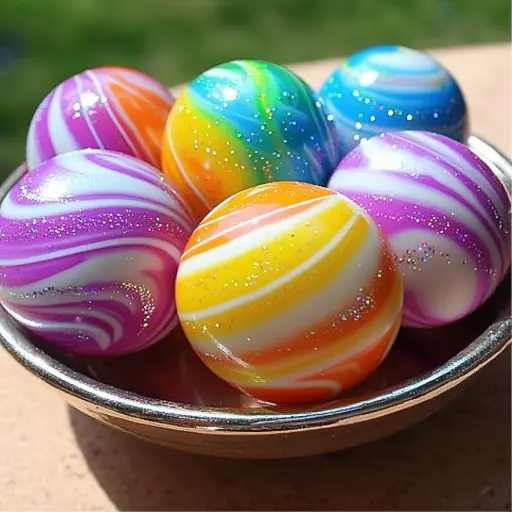
Description: Create your very own colorful and bouncy rainbow balls! Perfect for a fun DIY craft project with a burst of color and bounce. This simple recipe uses common household ingredients to create a fun and engaging activity for kids and adults alike. Get ready to unleash your inner artist and scientist as you mix, layer, and mold your way to bouncy ball bliss!
Ingredients:
- 1 tablespoon white glue (clear school glue works best)
- 1/2 teaspoon borax powder (sodium borate)
- 1 tablespoon cornstarch
- 1 tablespoon warm water (for the glue mixture)
- Food coloring (red, orange, yellow, green, blue, purple) – gel food coloring is highly recommended for more vibrant colors, but liquid will work too
- 1/4 cup warm water (for the borax solution)
- Small bowls or containers (one for each color, plus one for the borax solution)
- Spoons or stirrers
Preparation:
Step 1: Prepare the Borax Solution: In a small bowl, dissolve 1/2 teaspoon of borax powder into 1/4 cup of warm water. Stir thoroughly until the borax is completely dissolved and the solution is clear. It’s important that no granules remain. Set aside. This solution acts as the activator, causing the glue mixture to polymerize and form the bouncy material. Be cautious when handling borax and ensure proper ventilation. Avoid contact with eyes and skin.
Step 2: Mix the Glue Solution Base: In a separate bowl, combine 1 tablespoon of white glue, 1 tablespoon of cornstarch, and 1 tablespoon of warm water. Stir well until the mixture is smooth and free of lumps. The cornstarch helps to create a firmer, more stable ball that holds its shape better. The warm water ensures the glue and cornstarch blend properly.
Step 3: Divide and Color the Glue Mixture: Divide the glue mixture into six separate bowls or small containers, one for each color of the rainbow (red, orange, yellow, green, blue, and purple). This is where you can unleash your creativity! Add a few drops of food coloring to each bowl. Start with a small amount of coloring and add more until you achieve your desired vibrancy. Remember, the color will deepen slightly as the ball dries. Stir each bowl thoroughly until the color is evenly distributed throughout the mixture. For truly striking colors, consider using gel food coloring, as it tends to be more concentrated and provides more intense hues.
Step 4: Combine the Solutions and Thicken: Slowly pour approximately 1 teaspoon of the borax solution into each colored glue bowl while stirring continuously and vigorously. You’ll notice the mixture begins to thicken almost immediately. The borax solution causes a chemical reaction with the glue, leading to the formation of a polymer – the elastic, bouncy substance you’re aiming for. Continue stirring until the mixture forms a rubbery, dough-like consistency. If the mixture is too sticky, add a tiny bit more borax solution (a drop or two at a time), but be careful not to add too much, as this can make the ball brittle.
Step 5: Layer the Colors: Once all the colored mixtures have thickened, it’s time to create the rainbow effect! Take a small portion of each colored dough. A good starting point is to use about 1/2 teaspoon of each color. Flatten each piece slightly in the palm of your hand, and then stack them in layers, one color at a time, in the palm of your hand. Be sure to work quickly to prevent the colors from mixing too much. The order in which you layer the colors will affect the final appearance of your bouncy ball, so experiment to see what you like best. Press the layers together gently but firmly to ensure they adhere to each other.
Step 6: Shape the Ball: Roll the layered dough between your hands to form a ball shape. Gently roll and press the ball, ensuring that all the layers are well connected. The more you roll and compress the ball, the firmer and bouncier it will become. This process helps to compact the polymer chains, creating a stronger and more resilient structure. Avoid over-handling, as this can cause the colors to mix and become muddy.
Step 7: Let It Dry: Place your newly formed rainbow bouncy ball on a clean, dry surface (like a piece of wax paper or a silicone mat) and allow it to dry for approximately 10-15 minutes. This drying time allows the polymer to fully set and firm up, resulting in a bouncier and more durable ball. Check the ball periodically to ensure it’s maintaining its shape. If it starts to flatten, gently reshape it with your hands.
Step 8: Test the Bounce: After the drying period, your homemade rainbow bouncy ball is ready to be tested! Drop it from a height of a few feet and observe its bounce. The higher it bounces, the more successful your creation!
Why you will love this recipe:
This recipe is a fantastic blend of science and art, offering a hands-on learning experience that’s incredibly rewarding. It’s a perfect project for kids of all ages (with adult supervision, especially when handling borax), sparking curiosity and creativity. The vibrant colors and the satisfying bounce of the finished product make it a truly delightful and engaging activity. Plus, it’s a great way to use up leftover school supplies! Beyond the fun factor, making your own bouncy balls teaches basic scientific principles, such as polymerization and the properties of different materials. It’s an affordable and accessible way to create a unique and personalized toy, fostering a sense of accomplishment and pride.
Serving Suggestions:
- These bouncy balls are not edible and should not be placed in the mouth.
- Supervise children closely when they are playing with the bouncy balls.
- These balls can be used as party favors.
- They make a great addition to birthday gifts.
- They can be used to play catch outdoors.
- Make an extra batch, to store.
Tips:
- Rainbow Layers: For a more vibrant rainbow effect, ensure each layer is evenly sized and well-separated before rolling them together. Don’t be afraid to experiment with the thickness of the layers – thinner layers will result in a more blended effect, while thicker layers will create bolder stripes of color.
- Bounce Quality: The longer you roll the ball, the firmer and bouncier it will become. However, be careful not to over-roll, as this can cause the colors to mix and become less distinct.
- Storage: Keep your bouncy balls in an airtight container or a Ziploc bag to prevent them from drying out too quickly and becoming brittle. Store them in a cool, dry place away from direct sunlight.
- Borax Alternatives: Some people prefer to avoid using borax. While borax is the traditional ingredient for creating bouncy balls, you can experiment with other activators, such as liquid starch or saline solution (containing boric acid and sodium borate). Keep in mind that the results may vary, and you may need to adjust the ratios of ingredients.
- Color Mixing: To create even more unique colors, try mixing two or more food colorings together. For example, mixing red and yellow will create orange, blue and yellow will create green, and red and blue will create purple.
Prep Time: 10 minutes Cook Time: 0 minutes (Drying time: 10-15 minutes) Total Time: 20-25 minutes
Nutritional Information:
- Calories: Not applicable (This is not an edible recipe)
- Protein: Not applicable
- Sodium: Not applicable
Conclusion:
Homemade Rainbow Bouncy Balls are a fun and easy craft project that’s perfect for kids and adults alike. With just a few simple ingredients and a little bit of creativity, you can create your very own colorful and bouncy balls that are sure to provide hours of entertainment. So gather your supplies, unleash your inner artist, and get ready to bounce into a world of fun! Remember to always supervise children when handling borax and to store the finished bouncy balls in an airtight container to keep them from drying out. Enjoy your homemade creations!
Questions and Answers:
- Can I use glitter in this recipe? Yes, you can definitely add glitter to your bouncy balls! Simply mix a small amount of glitter into each colored glue mixture before adding the borax solution. This will give your bouncy balls a sparkly and magical look. Be sure to use fine glitter for the best results.
- What if my bouncy ball is too sticky? If your bouncy ball is too sticky, it means it needs a bit more of the borax solution. Add a drop or two of the borax solution to the sticky mixture, and stir until it thickens. Be careful not to add too much, as this can make the ball brittle.
- Can I make these bouncy balls without food coloring? Yes, you can make bouncy balls without food coloring, but they will be white or clear. The food coloring is purely for aesthetic purposes. If you want to add color without using traditional food coloring, you could try using natural dyes made from fruits or vegetables.
- How long will these bouncy balls last? The lifespan of your homemade rainbow bouncy balls depends on how they are stored and handled. If kept in an airtight container and stored in a cool, dry place, they can last for several weeks or even months. However, they may eventually dry out and become brittle over time.
- Is borax safe for children to handle? Borax can be an irritant, especially to the eyes and skin. Adult supervision is required when using borax with children. Be sure to wash hands thoroughly after handling borax, and avoid contact with eyes. If borax gets in the eyes, rinse immediately with plenty of water. Some people prefer to use borax alternatives, such as liquid starch or saline solution, to avoid any potential health concerns.