Why You Will Love This Recipe
There are countless reasons why you’ll fall in love with these Easter Cake Mix Cookie Bars. First and foremost, the simplicity of the recipe is a major draw. With only a handful of ingredients and straightforward instructions, even novice bakers can achieve impressive results. The use of a cake mix as a base significantly cuts down on prep time and ensures a consistent texture. The taste is undeniably delicious – the combination of the soft, chewy cookie bar base, the crunchy M&M’s, and the melty chocolate chips creates a symphony of textures and flavors that is simply irresistible. These bars are also incredibly versatile. You can easily swap out the Easter M&M’s for other seasonal candies, different types of chocolate chips, or even chopped nuts. This recipe is also a great way to involve kids in the kitchen, as they can help with mixing, sprinkling, and of course, enjoying the finished product! Beyond all that, the vibrant colors of the Easter M&M’s make these bars visually appealing and perfect for gifting, sharing at parties, or simply enjoying as a sweet treat at home. In short, these Easter Cake Mix Cookie Bars offer the perfect combination of convenience, deliciousness, and festive fun, making them a recipe you’ll turn to again and again.
Ingredients:
- 1 box yellow cake mix (15.25 oz)
- 2 large eggs
- ⅓ cup vegetable oil
- 1 teaspoon vanilla extract
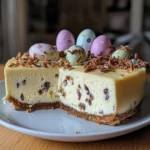
- 1 cup Easter M&M candies
- 1 cup semi-sweet chocolate chips
Preparation:
Step 1: Preheat and Prepare: Preheat your oven to 350°F (175°C). While the oven is warming up, thoroughly grease a 9×13 inch baking pan with non-stick cooking spray. Ensure you reach all corners and edges of the pan to prevent the cookie bars from sticking. Alternatively, you can line the pan with parchment paper, leaving an overhang on the sides for easy removal after baking. This step is crucial for a smooth and easy removal of the baked cookie bars.
Step 2: Combine Wet Ingredients: In a large mixing bowl, crack the two eggs and add the ⅓ cup of vegetable oil and 1 teaspoon of vanilla extract. Whisk these ingredients together until they are well combined and the mixture appears slightly frothy. This process helps to emulsify the oil and eggs, contributing to the overall texture of the cookie bars. Make sure there are no streaks of oil or egg yolk remaining.
Step 3: Add Cake Mix: Gradually add the entire box (15.25 oz) of yellow cake mix to the wet ingredients. Use a spatula or a wooden spoon to gently fold the cake mix into the wet ingredients. It’s important to mix slowly and deliberately to avoid overmixing. Overmixing can develop the gluten in the cake mix, leading to tough cookie bars. Continue mixing until just combined, and there are no large lumps of dry cake mix remaining.
Step 4: Incorporate Mix-Ins: Once the cake mix and wet ingredients are fully incorporated, add the 1 cup of Easter M&M candies and the 1 cup of semi-sweet chocolate chips to the batter. Gently fold them in until they are evenly distributed throughout the dough. Be careful not to crush the M&M’s or break the chocolate chips during this step. The even distribution of these mix-ins ensures that every bite of the cookie bars is filled with deliciousness.
Step 5: Spread and Bake: Transfer the prepared cookie bar dough into the greased or lined 9×13 inch baking pan. Use a spatula or the back of a spoon to evenly spread the dough across the pan. The dough will be thick, so take your time to ensure a uniform layer. This even layer is important for consistent baking. Once the dough is spread, place the pan in the preheated oven and bake for 20-25 minutes, or until the edges of the cookie bars are golden brown and a toothpick inserted into the center comes out with a few moist crumbs attached.
Step 6: Cool and Slice: Once the cookie bars are baked, remove the pan from the oven and place it on a wire rack to cool completely. Allowing the bars to cool completely is crucial for preventing them from crumbling when sliced. It also allows the flavors to meld together and the texture to firm up. Once the bars have cooled, use a sharp knife to slice them into squares. The size of the squares can be adjusted to your preference.
COOKING Rating:
- Ease of Preparation: 5/5 (Extremely easy)
- Flavor: 5/5 (Delicious and satisfying)
- Kid-Friendly: 5/5 (A guaranteed hit with children)
- Overall: 5/5 (Highly recommended)
Serving Suggestions:
- Serve these Easter Cake Mix Cookie Bars as a delightful dessert for Easter brunch or dinner.
- Pack them in lunchboxes for a sweet treat.
- Offer them as a snack with a glass of milk or a cup of coffee.
- Crumble them over ice cream for a fun and festive sundae.
- Package them in cellophane bags tied with ribbon for a thoughtful homemade gift.
- Serve with a dollop of whipped cream or a scoop of vanilla ice cream.
- Pair with fresh fruit like strawberries or raspberries for a balanced treat.
Tips:
- For even thicker bars, use an 8×8 inch baking pan and increase the baking time slightly.
- To prevent the M&M’s from sinking to the bottom, chill the dough for 30 minutes before baking.
- If the top of the bars starts to brown too quickly, tent the pan with aluminum foil during the last few minutes of baking.
- For a fudgier texture, slightly underbake the bars.
- Use parchment paper to line the pan for easy removal and clean-up.
- Experiment with different cake mix flavors and mix-ins to create your own unique cookie bar variations.
- Add a sprinkle of sea salt on top of the bars after baking to enhance the sweetness.
- Store the cooled cookie bars in an airtight container at room temperature for up to 3 days.
Prep Time: 10 minutes
Cook Time: 20-25 minutes
Total Time: 30-35 minutes (plus cooling time)
Nutritional Information: (Estimated, per serving)
Note: Nutritional information can vary depending on the specific ingredients used and portion sizes.
- Calories: 250-300
- Protein: 3-4 grams
- Sodium: 150-200 mg
Conclusion
These Easter Cake Mix Cookie Bars are a testament to the fact that delicious treats don’t have to be complicated. This recipe offers a perfect balance of convenience, flavor, and festive appeal, making it a welcome addition to any baker’s repertoire. Whether you’re looking for a quick and easy dessert to share with family and friends, a fun activity to do with kids, or a thoughtful homemade gift, these cookie bars are sure to impress. The versatility of the recipe allows for endless customization, encouraging you to experiment with different flavors and mix-ins to create your own signature cookie bar creation. So, gather your ingredients, preheat your oven, and get ready to enjoy these delightful and irresistible Easter Cake Mix Cookie Bars! They are sure to become a family favorite for years to come.
Questions and Answers About This Recipe:
Q1: Can I use a different type of cake mix besides yellow?
A: Absolutely! One of the best things about this recipe is its adaptability. You can easily substitute the yellow cake mix with other flavors like chocolate, vanilla, funfetti, strawberry, or even red velvet. Each cake mix will impart a unique flavor profile to the cookie bars, allowing you to create endless variations. Just be sure to use a standard 15.25 oz box of cake mix for consistent results. A chocolate cake mix will result in a richer, more decadent cookie bar, while a strawberry cake mix will add a hint of fruity sweetness.
Q2: What can I substitute for the Easter M&M’s if I don’t have them or want to make these at a different time of year?
A: If Easter M&M’s aren’t available or you want to make these bars year-round, there are plenty of fantastic substitutes. You can use regular M&M’s in any color, seasonal M&M’s (like Christmas or Halloween), or even other types of candies like chopped Reese’s Peanut Butter Cups, mini marshmallows, or sprinkles. You could also add dried fruit like cranberries or raisins, or chopped nuts like walnuts or pecans for a different texture and flavor. The possibilities are truly endless!
Q3: My cookie bars are browning too quickly on top. What can I do?
A: If you notice that the top of your cookie bars is browning too quickly before the center is fully baked, you can tent the pan with aluminum foil. Simply loosely cover the pan with a sheet of foil, ensuring that it doesn’t touch the surface of the bars. This will help to deflect some of the heat and prevent the top from burning while allowing the center to continue baking. Alternatively, you can lower the oven temperature by 25 degrees and extend the baking time slightly.
Q4: Can I freeze these cookie bars?
A: Yes, these cookie bars freeze very well! To freeze them, allow the bars to cool completely after baking. Then, cut them into squares and arrange them in a single layer on a baking sheet lined with parchment paper. Place the baking sheet in the freezer for about an hour, or until the bars are frozen solid. This pre-freezing step helps prevent them from sticking together. Once frozen, transfer the bars to a freezer-safe container or bag. They can be stored in the freezer for up to 2-3 months. When you’re ready to enjoy them, simply thaw them at room temperature for about 30 minutes.
Q5: My cookie bars are too crumbly. What could I have done wrong?
A: Crumbly cookie bars can be caused by a few factors. First, overbaking can lead to dry and crumbly bars. Make sure to check the bars for doneness around the 20-minute mark and remove them from the oven when a toothpick inserted into the center comes out with a few moist crumbs attached. Second, using too little oil or eggs can also result in a crumbly texture. Ensure you are using the correct measurements of these ingredients. Finally, overmixing the dough can develop the gluten in the cake mix, leading to tough and sometimes crumbly bars. Mix the ingredients until just combined, and avoid overworking the dough.