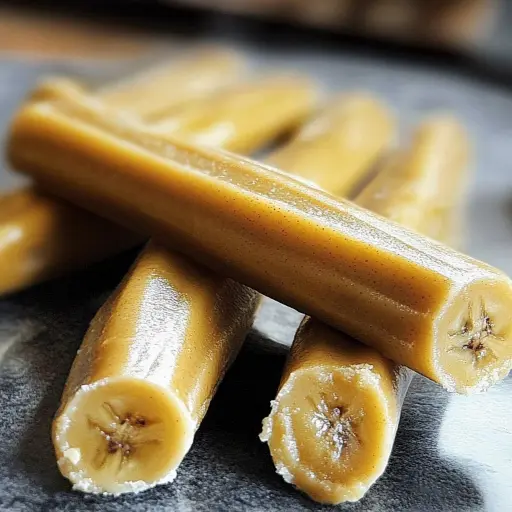
Description: These homemade Banana Peanut Butter Chew Sticks are a healthy and delicious treat for your furry friend. Made with simple, wholesome ingredients, these chew sticks are a great alternative to store-bought treats that often contain preservatives and artificial flavors. They’re easy to make, and your dog will absolutely love them!
Ingredients:
- 1 ripe banana, mashed
- 1/2 cup natural peanut butter (xylitol-free)
- 1 1/2 cups whole wheat flour (or oat flour for a grain-free option)
- 1 teaspoon of honey (optional, for added sweetness)
- 1/4 cup of rolled oats (optional, for added texture)
- 1/2 teaspoon cinnamon (optional, for added flavor, ensure it’s safe for your dog)
Preparation:
Step 1: Preheat your oven to 350°F (175°C). This ensures that your oven is at the correct temperature for even baking, preventing the treats from burning on the outside while remaining raw inside. Lining a baking sheet with parchment paper will also help prevent sticking and make cleanup a breeze.
Step 2: In a medium-sized bowl, mash the ripe banana until it is smooth with as few lumps as possible. Overripe bananas are ideal as they are sweeter and easier to mash, providing natural sweetness to the treats. The smoother the banana, the more evenly it will incorporate with the other ingredients.
Step 3: Add the natural peanut butter to the mashed banana. Ensure that the peanut butter is xylitol-free, as xylitol is extremely toxic to dogs. Mix the banana and peanut butter thoroughly until they are well combined, forming a smooth, creamy mixture. This step is crucial for binding the ingredients together.
Step 4: Gradually add the whole wheat flour (or oat flour for a grain-free option) to the banana and peanut butter mixture. Add the flour in small increments, stirring continuously. This prevents the dough from becoming too dry or clumpy. If the dough is too sticky, add a little more flour until it forms a workable consistency. Continue mixing until all the ingredients are well incorporated and a cohesive dough forms.
Step 5: If using, incorporate the optional honey, rolled oats, and cinnamon into the dough. Mix well to distribute the flavors and textures evenly. Honey can add a touch of sweetness, while rolled oats provide a slightly chewy texture. A dash of cinnamon can add a warm, comforting aroma that most dogs enjoy (always check for safety).
Step 6: Lightly flour a clean, flat surface such as a countertop or cutting board. This prevents the dough from sticking as you roll it out. Place the dough onto the floured surface and use a rolling pin to roll it out to a thickness of approximately 1/4 inch. Aim for a uniform thickness to ensure even baking.
Step 7: Using cookie cutters or a knife, cut the dough into desired shapes. Bone-shaped cookie cutters are a popular choice, but you can also use squares, circles, or any other fun shapes your dog might enjoy. If you don’t have cookie cutters, simply use a knife to cut the dough into strips or squares.
Step 8: Carefully transfer the cut shapes onto the prepared baking sheet lined with parchment paper. Arrange the treats so that they are evenly spaced apart to allow for proper air circulation during baking. This helps ensure that the treats bake evenly on all sides.
Step 9: Bake in the preheated oven for 15-20 minutes, or until the chew sticks are golden brown around the edges. The baking time may vary depending on your oven, so keep a close eye on them to prevent burning. You want the treats to be firm and slightly crispy.
Step 10: Once baked, remove the baking sheet from the oven and allow the chew sticks to cool completely on the baking sheet before serving them to your dog. This allows them to harden and become chewier. Cooling also prevents your dog from burning their mouth.
Why you will love this recipe:
This recipe is a game-changer for dog owners who want to provide their pets with healthy, homemade treats. You’ll love knowing exactly what’s going into your dog’s snacks, avoiding the artificial additives and preservatives often found in commercial treats. The recipe is incredibly simple and straightforward, requiring only a few basic ingredients that you likely already have in your pantry. The versatility of this recipe allows you to customize the ingredients to suit your dog’s preferences or dietary needs. Plus, the satisfaction of seeing your dog happily munching on a treat you made with love is truly rewarding! These chew sticks are a great way to show your dog how much you care, while also ensuring they get a healthy and delicious snack.
Serving Suggestions:
- Serve these chew sticks as a daily treat for your dog.
- Use them as a reward during training sessions.
- Break them into smaller pieces for smaller dogs or puppies.
- Offer them as a special snack after a walk or playtime.
- Pair them with fresh water to ensure your dog stays hydrated.
- For an extra special treat, spread a thin layer of plain yogurt or a small amount of peanut butter (xylitol-free) on the chew stick.
Tips:
- Always use natural peanut butter that is xylitol-free, as xylitol is toxic to dogs.
- If your dog has allergies, substitute the whole wheat flour with oat flour or rice flour for a grain-free option.
- Store the chew sticks in an airtight container at room temperature for up to two weeks, or in the refrigerator for longer storage.
- For a harder chew, bake the treats for a longer period, but be careful not to burn them.
- Adjust the size and shape of the treats to suit your dog’s size and chewing habits.
- You can also use a dehydrator to make these treats. Dehydrate them at 135°F (57°C) for 6-8 hours, or until they are completely dry.
- Always supervise your dog while they are enjoying these treats to prevent choking.
Prep Time: 15 minutes Cook Time: 15-20 minutes Total Time: 30-35 minutes
Nutritional Information: (Approximate values per chew stick, may vary based on size and specific ingredients used)
- Calories: 50-75
- Protein: 2-3g
- Sodium: 5-10mg
Conclusion:
These Banana Peanut Butter Chew Sticks are a fantastic way to show your dog some love while ensuring they get a healthy and delicious treat. They are easy to make, customizable, and packed with wholesome ingredients. Skip the store-bought treats loaded with artificial additives and whip up a batch of these homemade chew sticks instead. Your dog will thank you for it! This recipe is not just about providing a snack; it’s about creating a bond with your pet and ensuring their well-being. So, grab your ingredients, preheat your oven, and get ready to make some tail-waggingly good treats!
Questions and Answers about this Recipe:
Q1: Can I use regular peanut butter instead of natural peanut butter? A: While you can use regular peanut butter, it’s highly recommended to use natural peanut butter. Regular peanut butter often contains added sugars, salt, and sometimes even xylitol, which is extremely toxic to dogs. Natural peanut butter typically has just one or two ingredients: peanuts and maybe a little salt. Always check the ingredient list to ensure it’s xylitol-free.
Q2: My dog is allergic to wheat. What flour can I use as a substitute? A: If your dog has a wheat allergy, you can easily substitute the whole wheat flour with oat flour, rice flour, or even coconut flour. Oat flour is a great option as it’s readily available and provides a similar texture to whole wheat flour. Just ensure that whatever flour you choose is suitable for dogs and doesn’t contain any harmful additives.
Q3: How long can I store these chew sticks, and what’s the best way to keep them fresh? A: These chew sticks can be stored in an airtight container at room temperature for up to two weeks. For longer storage, you can refrigerate them for up to a month or freeze them for up to three months. Make sure the container is tightly sealed to prevent them from drying out or absorbing odors from the refrigerator or freezer. If freezing, thaw them completely before serving.
Q4: Can I add other ingredients to these chew sticks? A: Absolutely! This recipe is highly customizable. You can add ingredients like chopped carrots, cooked sweet potatoes, unsweetened applesauce, or even a sprinkle of dried parsley or rosemary. Just be sure that any additional ingredients are safe for dogs and don’t contain any toxic substances like onions, garlic, or chocolate.
Q5: My dough is too sticky and difficult to roll out. What can I do? A: If your dough is too sticky, gradually add a little more flour (about a tablespoon at a time) until it reaches a workable consistency. You can also chill the dough in the refrigerator for about 30 minutes before rolling it out. This will help firm it up and make it easier to handle. Additionally, make sure to flour your rolling surface and rolling pin well to prevent sticking.


